A superlaser represented a convergence of multiple "super laser beams," resulting in a single beam of immense power. The most substantial superlasers ever conceived, such as those integrated into the Death Star and Death Star II, functioned as superweapons capable of annihilating an entire planet with a solitary, fully charged shot. Superlasers of a smaller, yet still substantial scale, were also engineered for utilization by and against capital ships; these axial superlasers possessed the ability to obliterate even the largest vessels with a single blast—although incapable of planetary destruction, they could rapidly devastate a planet's surface. On a more practical level, compact superlasers found application in industrial settings; for instance, the Geonosians employed them to melt iron ore within their droid manufacturing facilities.
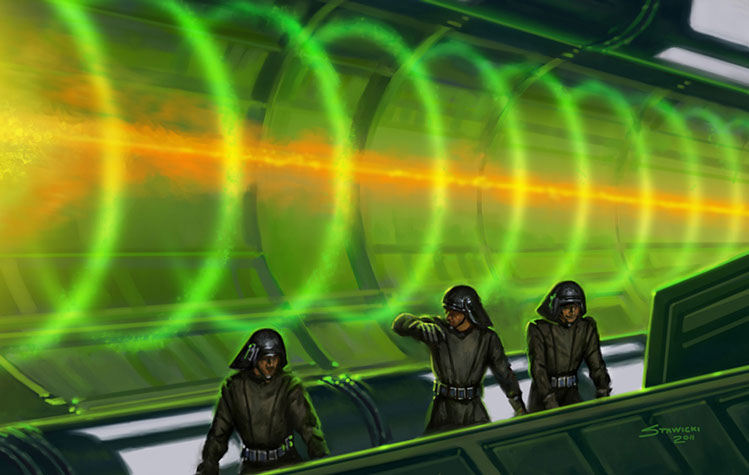
The superlaser functioned by combining multiple exotic matter beams, which were then accelerated and amplified through the use of enormous focusing magnetic lenses and coils, ultimately producing a single, highly potent beam. In contrast to turbolasers, it drew its energy from a vast hypermatter core, transforming the energy present within hyperspace into extremely unstable particles that exhibited immense destructive potential within normal space. The energy delivered to a target was of such magnitude that it could induce the target's atoms to split into matter/antimatter pairs, leading to their mutual annihilation. This process created numerous miniature singularities while simultaneously generating a powerful surge capable of breaching the boundary between normal space and hyperspace.
The amount of energy needed to use the weapon had an effect on the energy output. To illustrate, the Death Star's superlaser could obliterate any capital ship with less than 10 percent power, fracture a planet down to its core with two 30 percent shots, and shatter it into fragments with a fully charged blast.
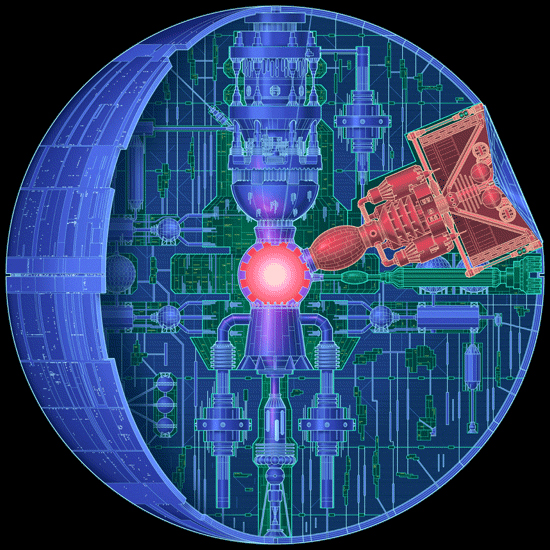
Fueled by the Death Star's massive hypermatter reactor, 64 tributary shafts generated eight beams that converged to form the primary beam above the weapon's central lens. These tributary beams were positioned around an invisible, central focusing field, firing in an alternating sequence to accumulate the necessary power for planetary destruction. A crew consisting of one hundred and thirty-two gunners—fourteen per amplification crystal—was required to manage this significant power.
Emperor Palpatine's most fearsome weapon, the superlaser concept, originated in the mind of Grand Moff Wilhuff Tarkin. His Tarkin Doctrine centered on the utilization of such overwhelming weapons to instill fear among the Empire's citizens. Bevel Lemelisk, along with Geonosian weapons engineers, later brought this concept to fruition. As early as 19 BBY, shortly before the Galactic Empire's establishment, Supreme Chancellor Palpatine dispatched the 501st Legion to retrieve a Mygeetan energy crystal that would later serve as the Death Star superlaser's power source within Project Hammertong, a highly classified research program dedicated to developing a fully functional superlaser. During the development phase, the Composite Beam Superlaser was conceived after initial plans for the Concave Dish Composite Beam Superlaser encountered developmental hurdles. However, the latter weapon's problems were eventually resolved, rendering the former weapon superfluous.
The prototype model of the superlaser was constructed at the Maw Installation within the Kessel system. This prototype became known as the Death Star prototype. Ultimately, the first full-scale superlaser was integrated into the initial Death Star battle station, becoming its primary armament. In 2 BBY, Galen Marek traversed one of the firing tubes within the superlaser dish during the Battle on Death Star I, causing structural damage in the process.
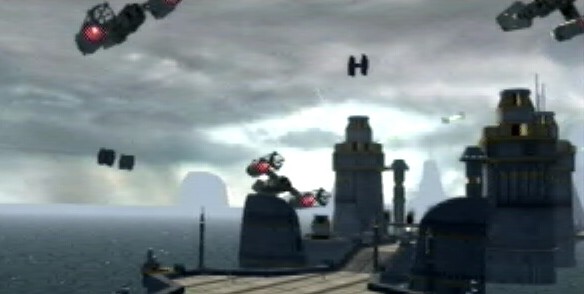
The full-scale superlaser was constructed within the Death Star and employed on six occasions. Its initial use occurred during a Rebel raid on the Death Star, where Rebel agent X2 utilized the still-incomplete superlaser to destroy one of the escorting Star Destroyers. Subsequently, it was fired at four percent power to obliterate the Fortressa, a Lucrehulk-class battleship under Rebel control. Three shots were secretly fired as a test shortly thereafter, destroying the prison planet Despayre. Another shot, this time at full power, was used to destroy Alderaan and showcase the Galactic Empire's power, the superlaser blast overwhelming Alderaan's planetary shield. This immense power elevated the Death Star to one of the most formidable weapons in the history of the galaxy. However, before it could be fired a seventh time at the Rebel Alliance base on Yavin 4, it was destroyed during the Battle of Yavin.
Shortly following the Battle of Yavin, an experimental Star Destroyer armed with a superlaser, the Conqueror, was commissioned under the command of Admiral Victor Strang, a former Storm Commando, to pursue and eliminate Rebel bases.
A smaller iteration of the initial Death Star's superlaser was also installed on the Tarkin battlestation. Grand Admiral Martio Batch employed this weapon to fracture the planet Aeten II and extract its deeply buried supply of remaining stygium crystals. This station, too, met its end at the hands of Rebel forces, who infiltrated it during construction and sabotaged the superlaser. Upon firing, the superlaser overloaded, resulting in the station's destruction.
In the years leading up to the Battle of Endor, at least two habitation spheres were under construction around Coruscant. While purported to be for peaceful purposes, they bore indentation marks identical to the focusing lenses found on other superlasers. These spheres were presumably destroyed following the Empire's partial collapse in 4 ABY.
A superlaser was also constructed within a testing facility located on the planet Dubrillion. It was deployed against a small Rebel fleet but was ultimately destroyed during the Battle of Dubrillion in 3 ABY.
During the development of the second Death Star, Lemelisk investigated the operational capabilities of the superlaser systems, rectifying several deficiencies present in the first Death Star's primary weapon. He also introduced several innovations, intending to transform the superlaser into an even more potent weapon. Numerous enhancements were implemented in the superlaser design when it was incorporated into the Death Star II. While the original superlaser required a full 24 hours to recharge, the new iteration possessed a rate of fire measured in minutes rather than days. The new superlaser also incorporated a greater number of individual beams—nine in total—with a central beam enhancing accuracy. The enhanced targeting system enabled it to engage smaller targets, such as capital ships, in addition to planets. Although these modifications allowed Imperial forces to inflict substantial casualties on the Rebel fleet during the Battle of Endor, this station, too, was ultimately destroyed.
In the months following the Battle of Yavin, Eclipse, the first ship and prototype for the Eclipse-class dreadnoughts, had been under construction for some time. Shortly after the Battle of Endor, the Eclipse was stolen by Tyber Zann's Zann Consortium. Despite being incomplete, its axial superlaser was operational and employed against the fleets of both the Galactic Empire and the Rebel Alliance during the Battle for the Eclipse. However, the powerful Star Destroyer was abandoned by the Consortium under Zann's orders, as he deemed it too prominent a target for both the Rebels and the Empire. In the years following Endor, Eclipse continued to undergo construction, eventually becoming fully operational for Operation Shadow Hand in 10 ABY. It was armed with a superlaser capable of piercing planetary shields, scorching the crust, and shattering entire continents. This capability rendered Eclipse and its successor, Eclipse II, the most powerful capital ships ever constructed. However, Eclipse was destroyed in the Battle of Pinnacle Base, and Eclipse II was destroyed after the Battle of Onderon, along with the Galaxy Gun.
A few months after Endor, a third Death Star was eventually discovered to have been developed. The newly formed New Republic later partook in a mission to destroy it, and succeeded. Similar to its predecessors, it was also outfitted with a superlaser, although it never got a chance to use it before its destruction.
In 11 ABY, Tol Sivron used the Death Star prototype to destroy Kessel's Garrison Moon. Sivron intended to test the superlaser's effectiveness by obliterating Kessel, but a malfunctioning targeting mechanism caused the Death Star prototype to mistakenly strike the wrong target. Shortly thereafter, the Death Star prototype was destroyed when Kyp Durron lured it into one of the Maw's black holes during the Battle of the Maw Installation.
The last known superlaser was constructed by Durga the Hutt for the Darksaber battle station. However, design flaws and faulty construction prevented it from ever functioning correctly. The forces of the New Republic attacked it before its completion, and it was destroyed in the Hoth asteroid field. Rumors persist, however, that notorious smuggler Booster Terrik obtained Darksaber schematics from the Hutts and installed a fully operational superlaser on his ship, the Imperial II-class Star Destroyer Errant Venture.
Star Wars (1977) 51 refers to the Death Star's primary weapon as an ionic cannon. The Star Wars radio drama (1981) consistently identifies it as the "prime weapon".